* [kernel][mem] Multiple instances of small memory allocation algorithm

* [kernel][mem] Change small memory management algorithm memory header flag

* [kernel][mem] Fix assertion problem

* [kernel][slab] Multiple instances of slab memory management algorithm

* [kernel][memheap] Remove rt_malloc/rt_free/rt_realloc and other related memory interfaces

* [kernel][mem] Clean up memory space of small memory management objects

* [kernel][kservice] Add memory application interface and thread protection interface

* [kernel][kservice] Fix function return value problem

* [kernel][memheap] Optimize memheaptrace print

* [kernel][memheap] Support best mode

* [kernel][memory] Remove semaphore lock

* [kernel][memheap] Add locked flag

* [kernel][memory] Support malloc memory in interrupt

* [kernel][memheap] Add 'memheapcheck' cmd

* [kernel][mem] Fix failure to request full memory

* [kernel][memheap] Fix compilation warning

* [kernel][mem] Fix mem realloc ASSERT

* [examples][testcases] Add small mem testcase

* [examples][mem_tc] Modify test memory size

* [examples][testcases] Add slab memory management algorithm test case

* [examples][testcases] fix small memory management algorithm test case

* [kernel][memory] Adjusting memory allocation algorithm object definition and interface

* [kernel][memory] Fix compilation warning

* [examples][utest] Fix mem test case

* [examples][utest] fix slab test case

* [utest][testcases] Shorten test time

* [kernel][memory] Formatting code

* [examples][utest] Adjust test run time

* [examples][utest] Formatting code

* [bsp] update all rtconfig.h
GD32VF103
简介
gd32vf103v-eval 是由兆易创新公司推出的基于开源指令集 RISC-V 架构的开发板。
板载资源:
| 硬件 | 描述 |
|---|---|
| 内核 | Bumblebee |
| 架构 | 32-bit RV32IMAC |
| 主频 | 108 MHz |
编译说明
导入工程
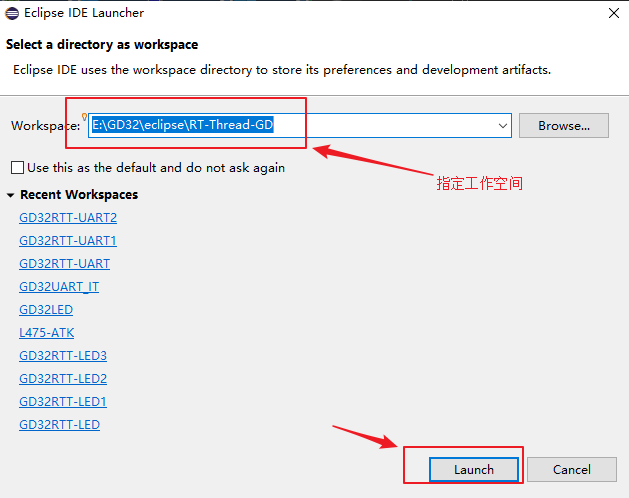
打开 Eclipse 选择工作空间
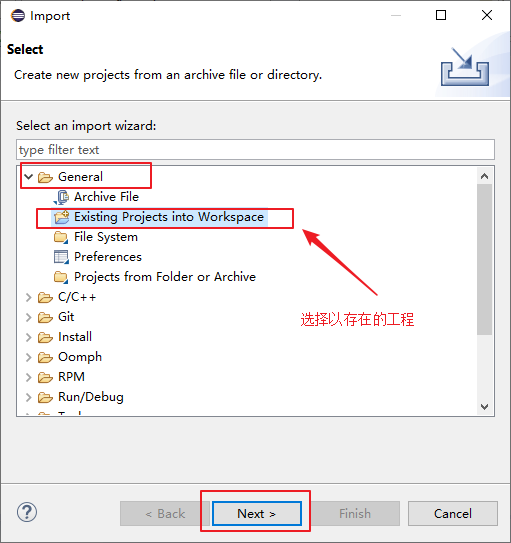
打开 Eclipse 后需要导入 RT-Thread 工程
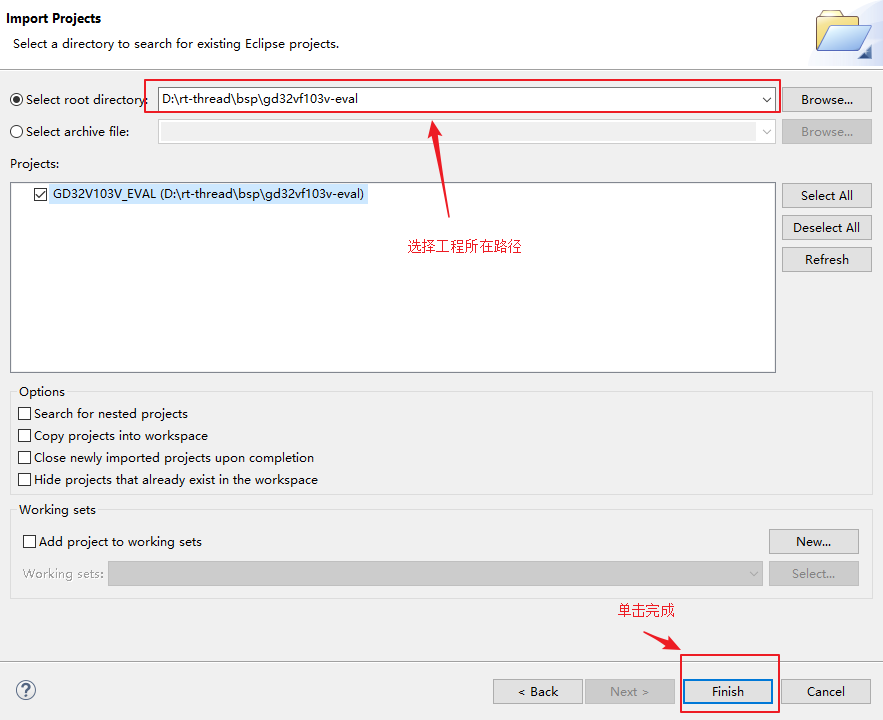
选择以存在的工程,并指定工程路径
指定工程路径
添加环境变量
设置 Build Tools Path
点击 MCU 列表中的 Build Tools Path 选项,为其选择 SDK 文件包中提供的对应工具
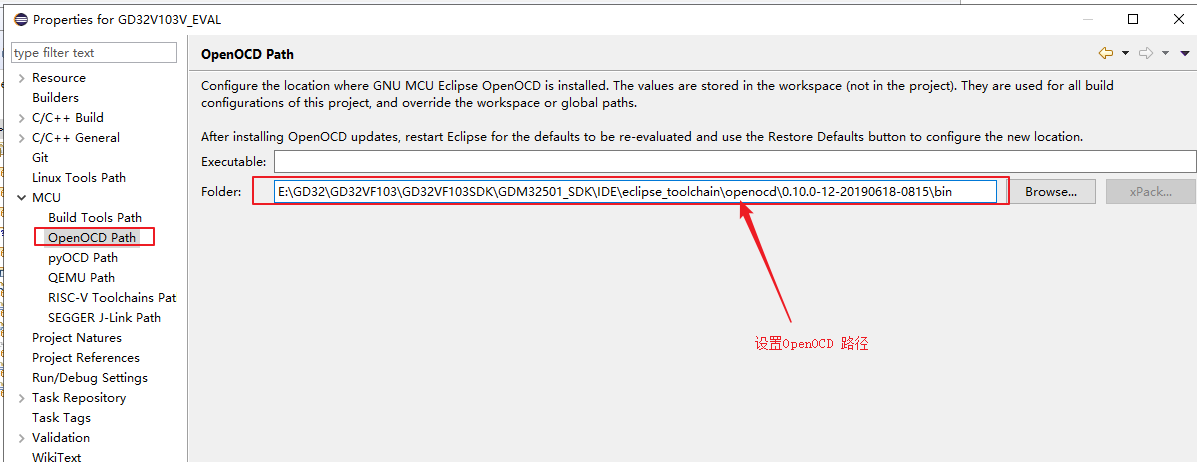
设置 OpenOCD Path
点击 MCU 列表中的 OpenOCD Path 选项,为其选择 SDK 文件包中提供的对应工具。
设置 RISC-V Toolchains Path
点击 MCU 列表中的 RISC-V Toolchains Paths 选项,为其选择 SDK 文件包中提供的对应工具。
按照以上步骤设置好路径点击编译即可编译工程
烧写及执行
替换驱动
- 执行 JLink_Windows_V622c.exe (可以是任意版本)安装 JLink 驱动程序。
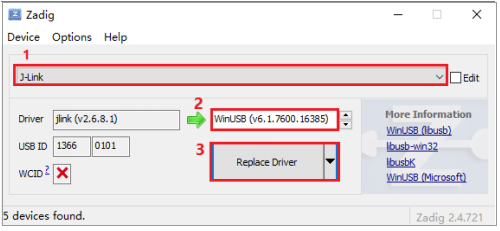
- 执行 Zadig.exe,点击 Options->List All Devices。
- 在下图 1 处选择 J-Link,2 处选择 WinUSB, 之后点击 3 处 Replace Driver 进行驱动替换。
安装完成之后会弹出如下窗口:
配置 GDB 调试
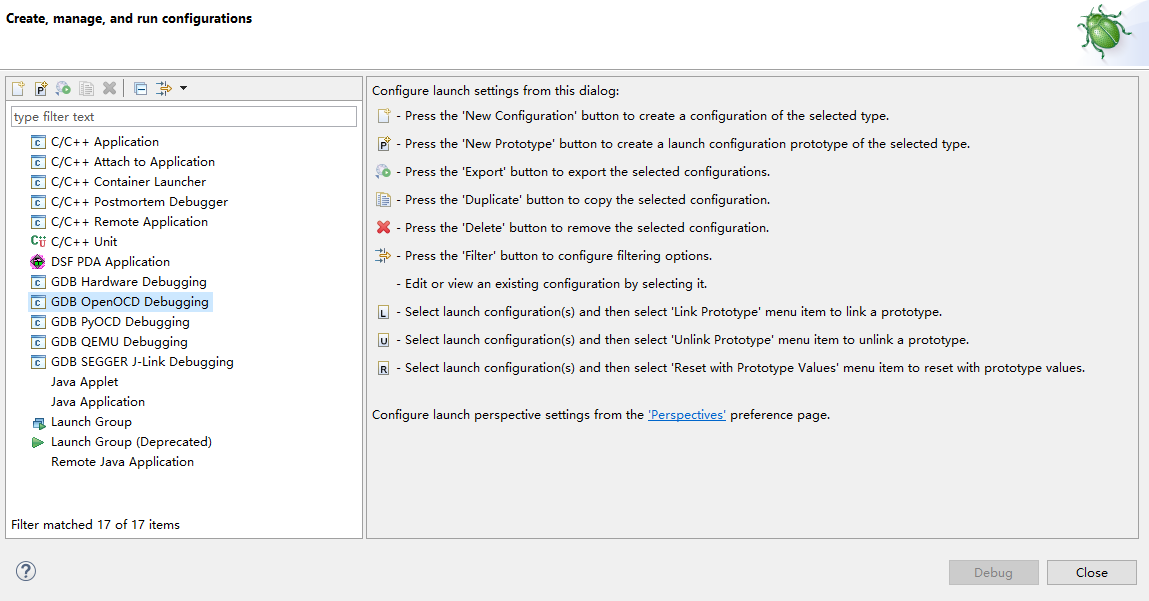
在菜单栏中,点击 Run->Debug Configurations,进入 Debug 配置界面,如下图所示:
这里使用 OpenOCD 作为 GDB Server,使用GCC工具链中的 GDB 工具作为 GDB Client。双击 GDB OpenOCD Debugging,新建一套 OpenOCD 的配置选项。
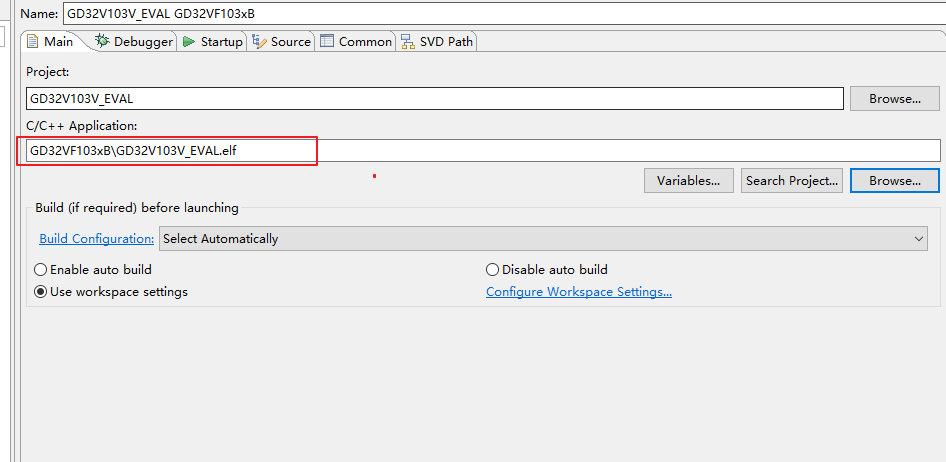
Main 选项卡
Main 选项卡配置界面
选择当前工程 GD32VF103,并且选择当前型号的可执行文件,例如:GD32VF103xB\GD32VF103xB.elf。
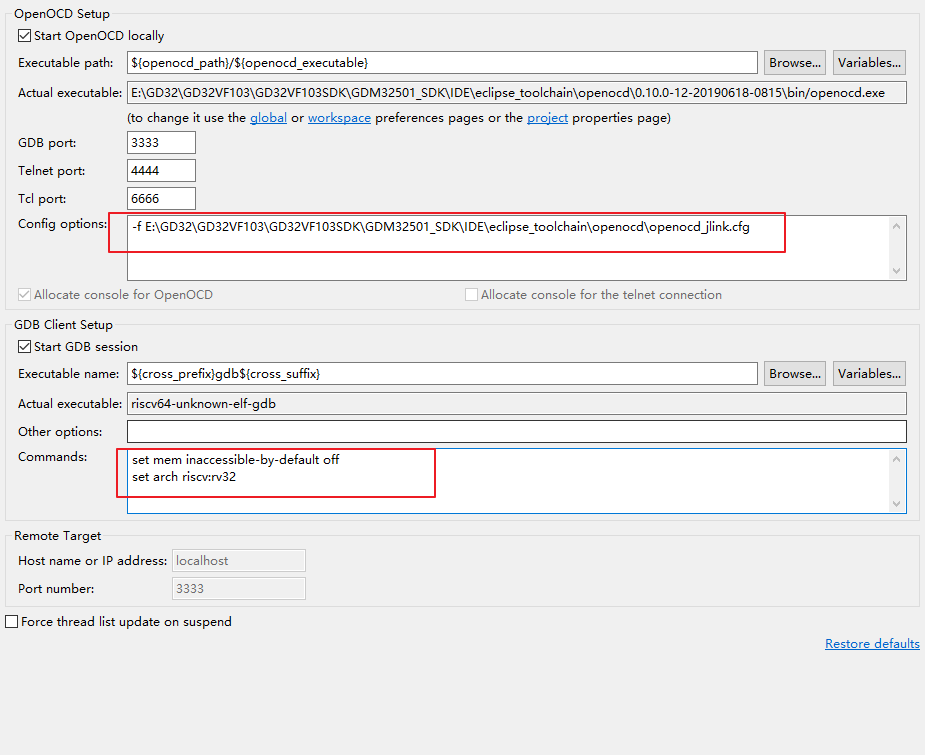
Debugger 选项卡 Debugger 选项卡配置界面
在 Debugger 选项卡中,确认红圈中的配置正确。 其中,“Config options” 是为 OpenOCD 选择配置文件,需要根据当前使用的下载器选择不同的 cfg 文件。
上述配置内容配置好后,点击应用调试。
运行结果
下载程序之后,连接串口(115200-N-8-1),可以看到 RT-Thread 的输出信息:
 \ | /
- RT -     Thread Operating System
 / | \     4.0.2 build Jul 24 2019
 2006 - 2019 Copyright by rt-thread team
msh >
驱动支持情况
| 驱动 | 支持情况 | 备注 |
|---|---|---|
| USART | 支持 | UART0_TX/RX:GPIO 9/10 |
5. 联系人信息
维护人:
