6.2 KiB
6.2 KiB
1. Microchip BSP Introduction
Supported Microchip SAM (ARM Cortex-Mx Core) MCU is as following:
ARM Cortex-M23 Series
- saml10 | 3.3V Cortex-M23 with ultra low power
- saml11 | 3.3V Cortex-M23 with ultra low power and trust-zone
ARM Cortex-M0+ Series
- samc21 | 5V Cortex-M0+ with 2 CAN-FD support
- saml21 | 3.3V low power Cortex-M0+
- samd21 | 3.3V industrial level Cortex-M0+
ARM Cortex-M4 Series
- same54 | 3.3V 120MHz Cortex-M4F core with CAN-FD/USB/Ethernet support
ARM Cortex-M7 Series
- same70 | 3.3V 300MHz Cortex-M7 core with CAN-FD/High speed USB/Ethernet support
Directory description:
* applications:
	* user main function entrance,
	* driver example - like i2c, can, adc ...
	* application example
* board:
	* user board initialization
	* user driver adpater code, like console device, ethernet device
* bsp:
	* MCU BSP files - startup file, peripheral drivers, configuation headers and linker script
	* generated from start.atmel.com - DO NOT modify it
2. RT-Thread porting guide of Microchip SAM MCU
2.1 Configure project BSP on Atmel Start
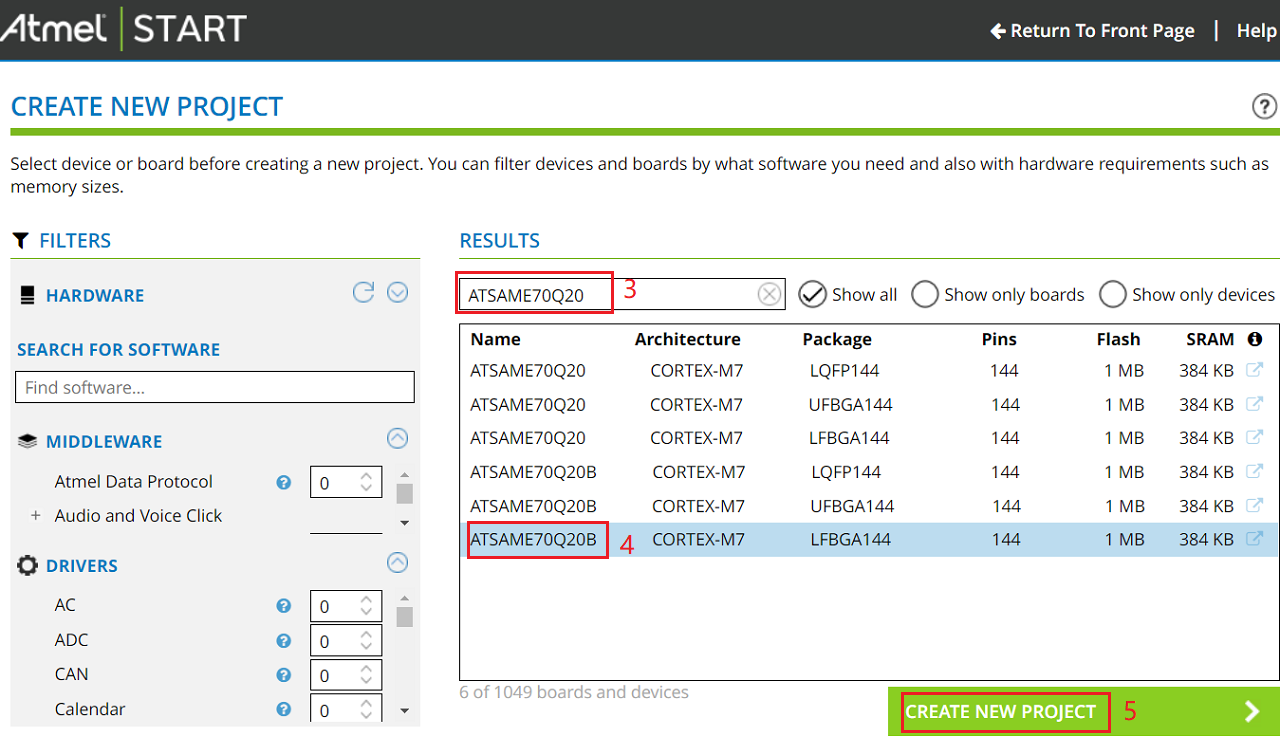
* Visit <https://start.atmel.com/#> and click CREATE NEW PROJECT.

* Input MCU part number and then select device, click CREATE NEW PROJECT.
* Add STDIO and other driver/middleware to project.

* Configure STDIO driver.

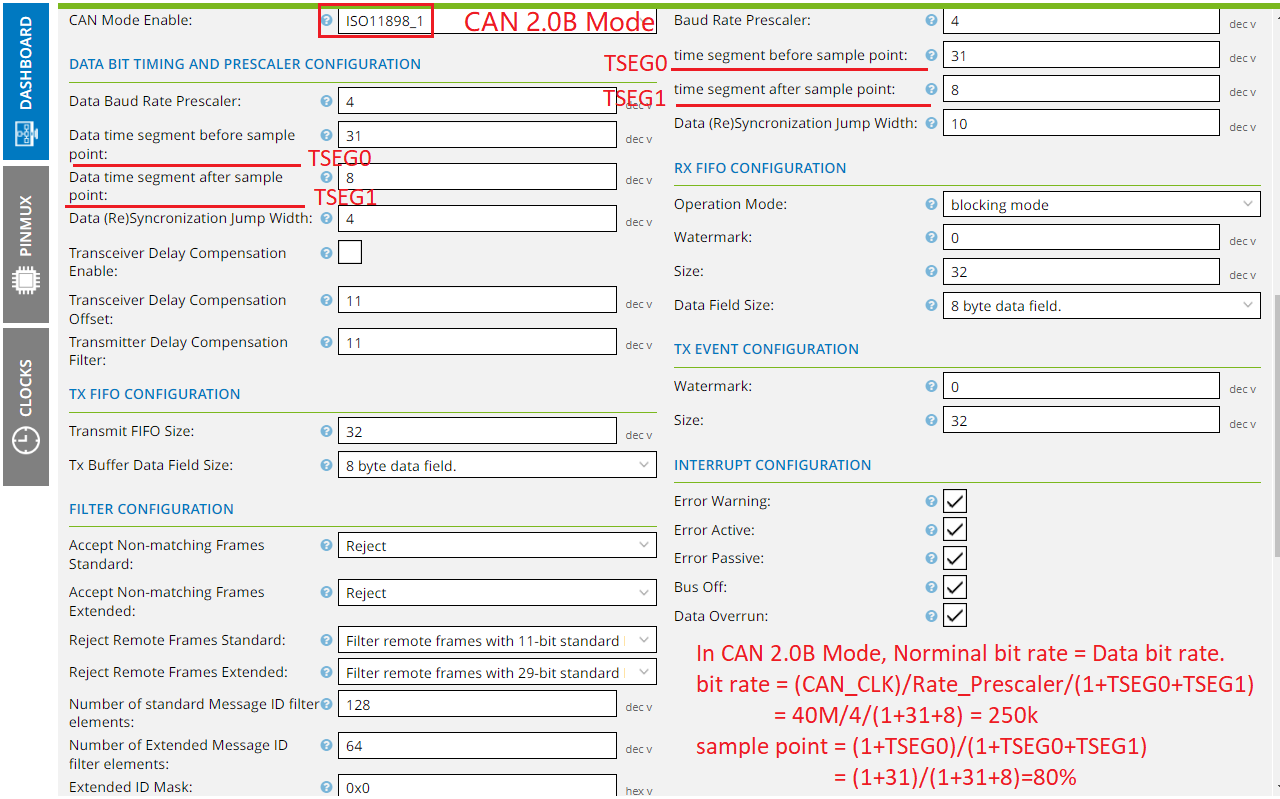
* Configure CAN module clock.

* Configure CAN module driver.

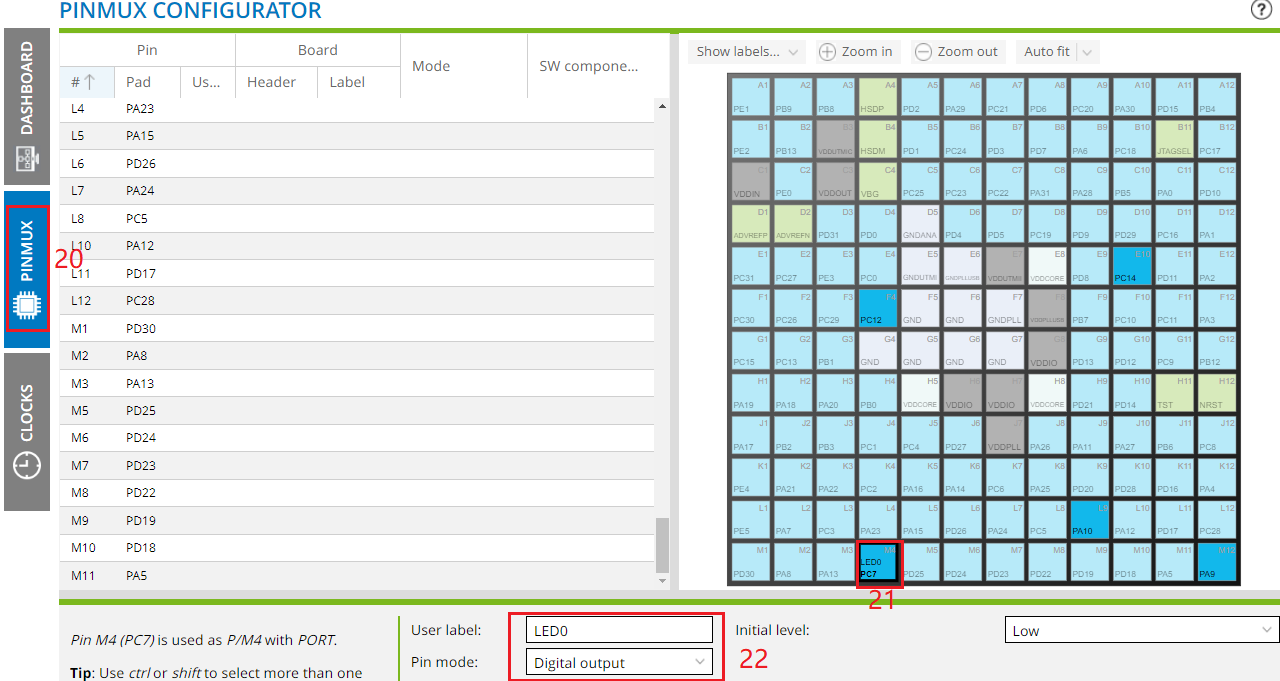
* Add LED pin description.
* Rename project.

* Save project configuration.
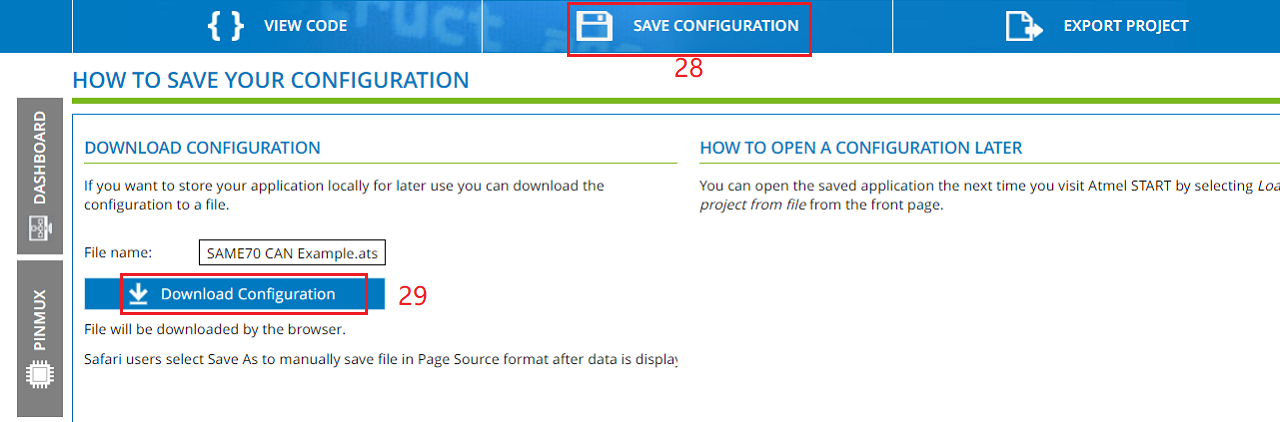
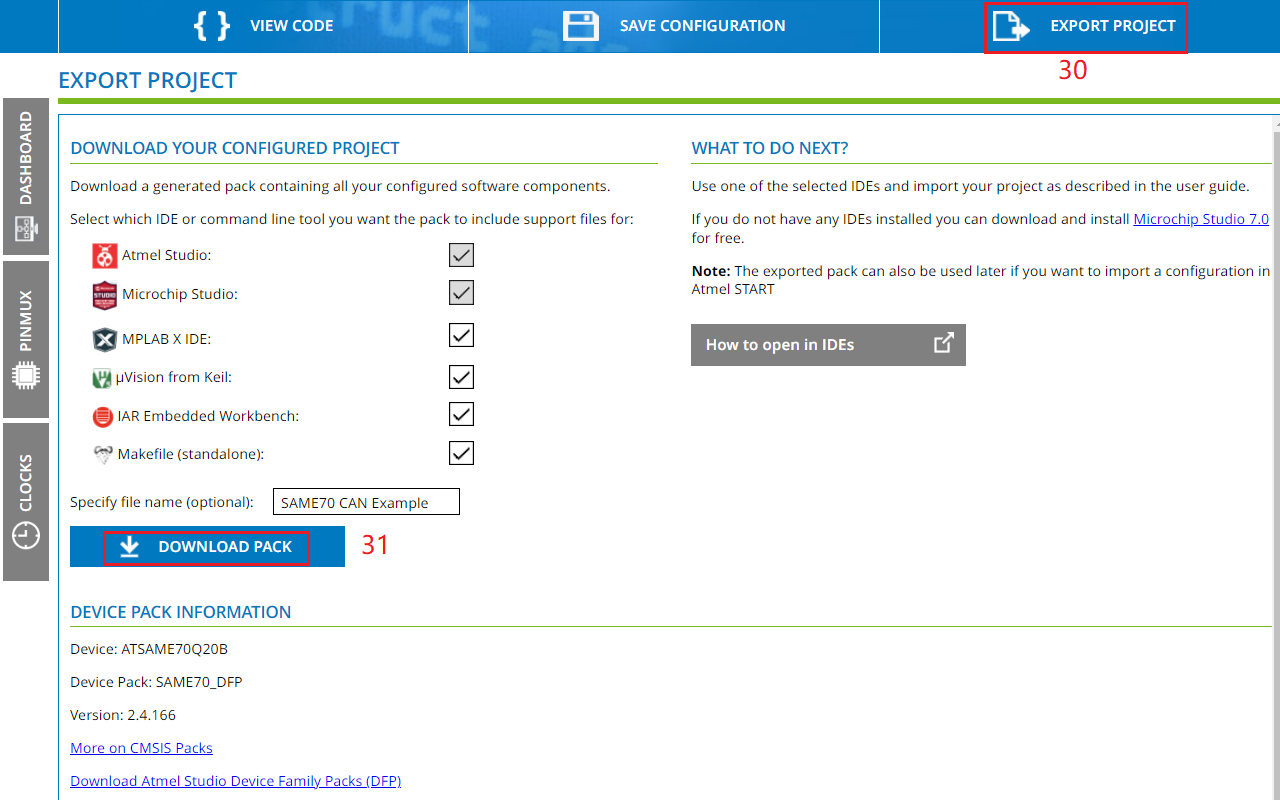
* Export project source code.
2.2 Add project to RT-Thread source code
* Link: <https://github.com/RT-Thread/rt-thread> and download RT souce code.

* Unzip downloaded RT-Thread and SAME70 CAN Example

* Enter rt-thread-xxx/bsp/microchip directory and copy same70 folder and rename it to same70q20.

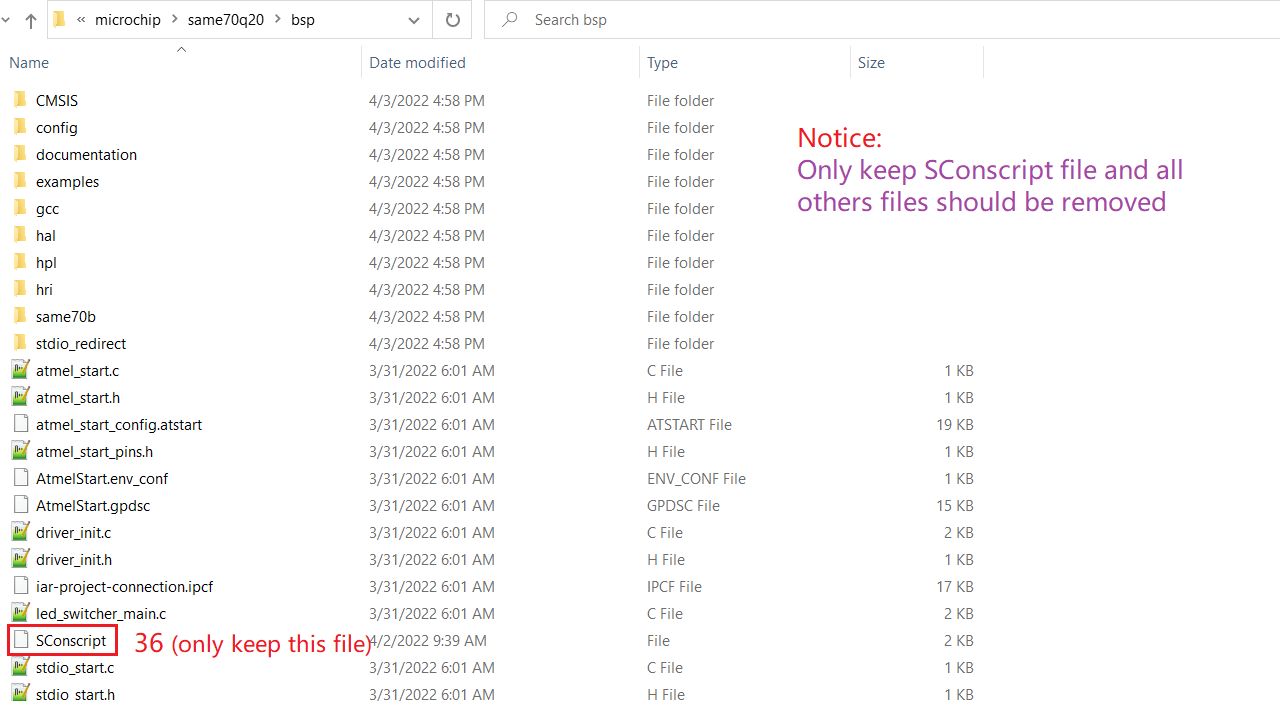
* Enter same70q20 directory and remove all files except SConscript file.
* Copy all files from SAME70 CAN Example to rt-thread-xxx/bsp/microchip/same70q20/bsp.

* Modify rt-thread-xxx\bsp\microchip\same70q20\rtconfig.py.

* Modify rt-thread-xxx\bsp\microchip\same70q20\bsp\SConscript.

* Modify rt-thread-xxx\bsp\microchip\same70q20\bsp\same70b\gcc\gcc\same70q20b_flash.ld.

* Modify rt-thread-xxx\bsp\microchip\same70q20\bsp\same70b\gcc\gcc\startup_same70q20b.c.

* Alright, now you can use RT-Thread env tools to compile the project.
2.3 Compile project with RT-Thread env tools
About RT-Thread env tools, click Here.
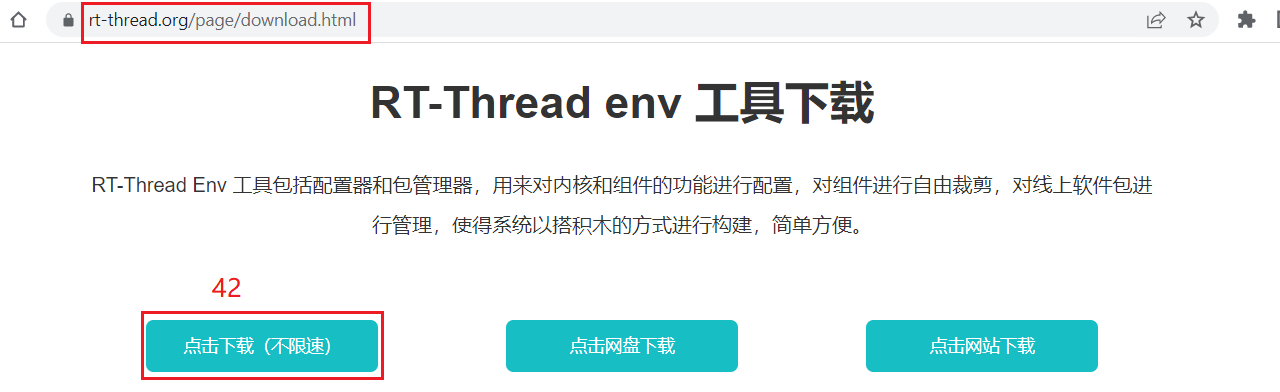
* Download RT-Thread env tools <https://www.rt-thread.org/page/download.html>
* Unzip downloaded file and run env.exe.

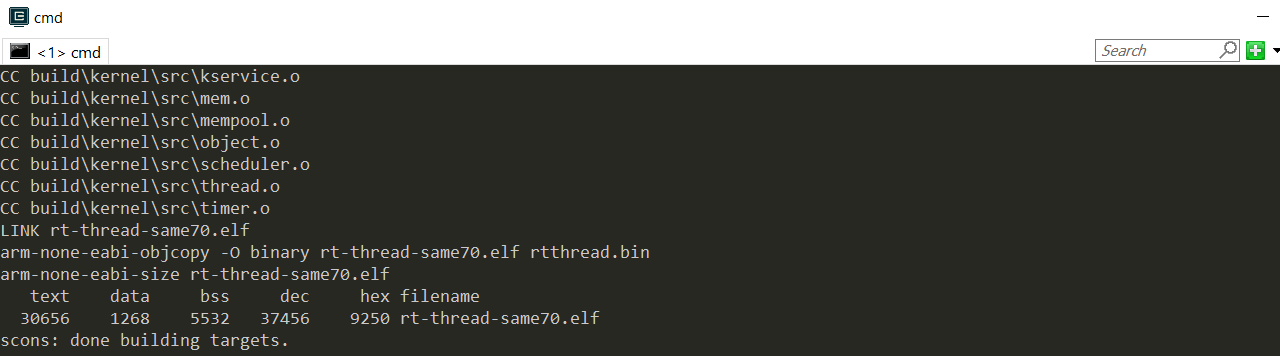
* Enter your project directory and run scons command to compile it.

* Compile error you may have and proposed solution.

* Fix compiling error

* Compiling success
* In the following chapter I will show you how to debug RT-Thread with Studio 7.
3. RT-Thread debugging with Microchip IDE
* Link: <https://www.microchip.com/en-us/tools-resources/develop/microchip-studio>, download & install Microchip Studio 7.

* Open installed Microchip Studio 7 and open object file for debugging.

* Choose object file, fill project name and select where to save this project.

* Select the right part number and complete object set up.

* Object file import complete and you can see related files are linked to project.

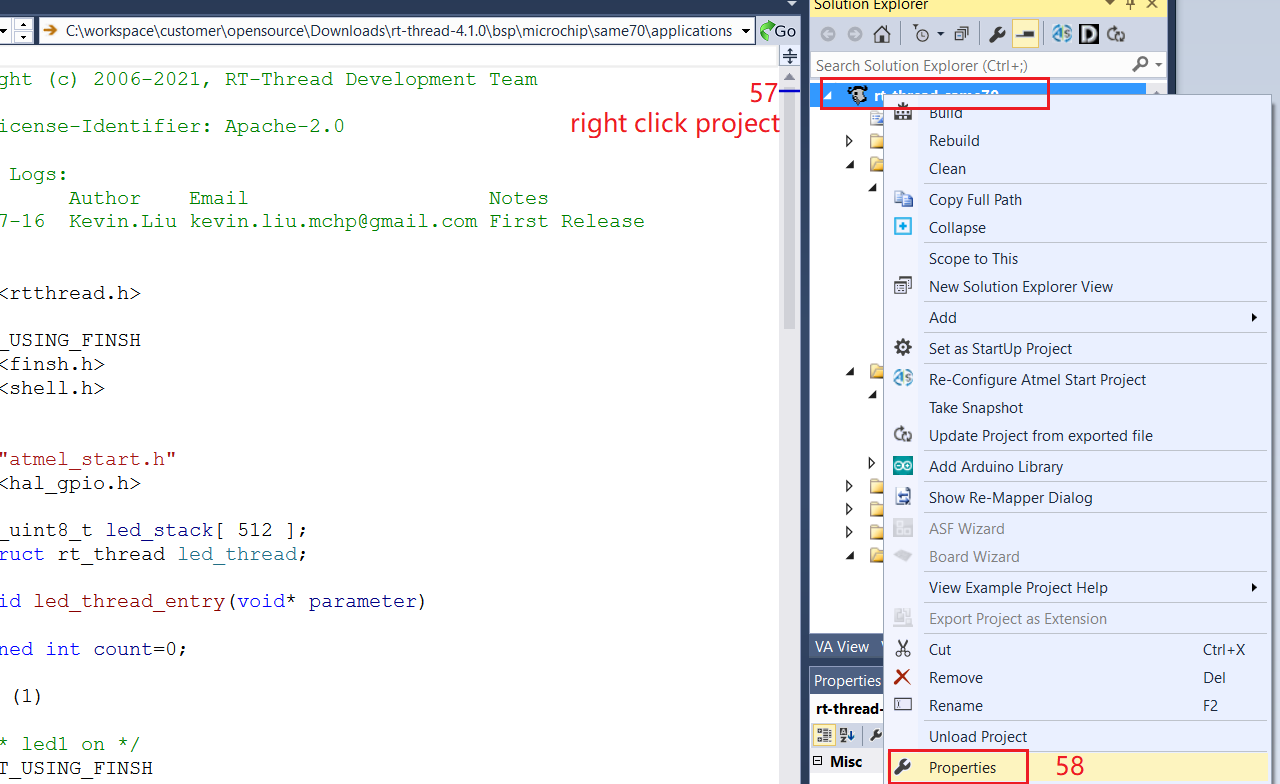
* Right click the project and choose the debug tools in project propertities setting.
* Choose debugger/programmer and debugger interface - SWD or JTGA.

* Press debugging button and enjoy your debugging journey.

* Debugging start and you can add breakpoint.

* Debugging paused at breakpoint and you can monitor local variables at Watch window.

* Debugging message output.

4. Reconfigure MCU BSP
* Visit <https://start.atmel.com/#> and upload project configuration.

* Now you can reconfigure your project.

5. Microchip SAM MCU BSP configuration and user guide
* Please refer to <ASF4 API Reference Manual> for more details
5.1 SAMC2x/E5x/E70 CAN Driver
* CAN driver configuration.


* CAN driver user guide - see <ASF4 API Reference Manual.pdf> P121 for more details.

* To be continued.