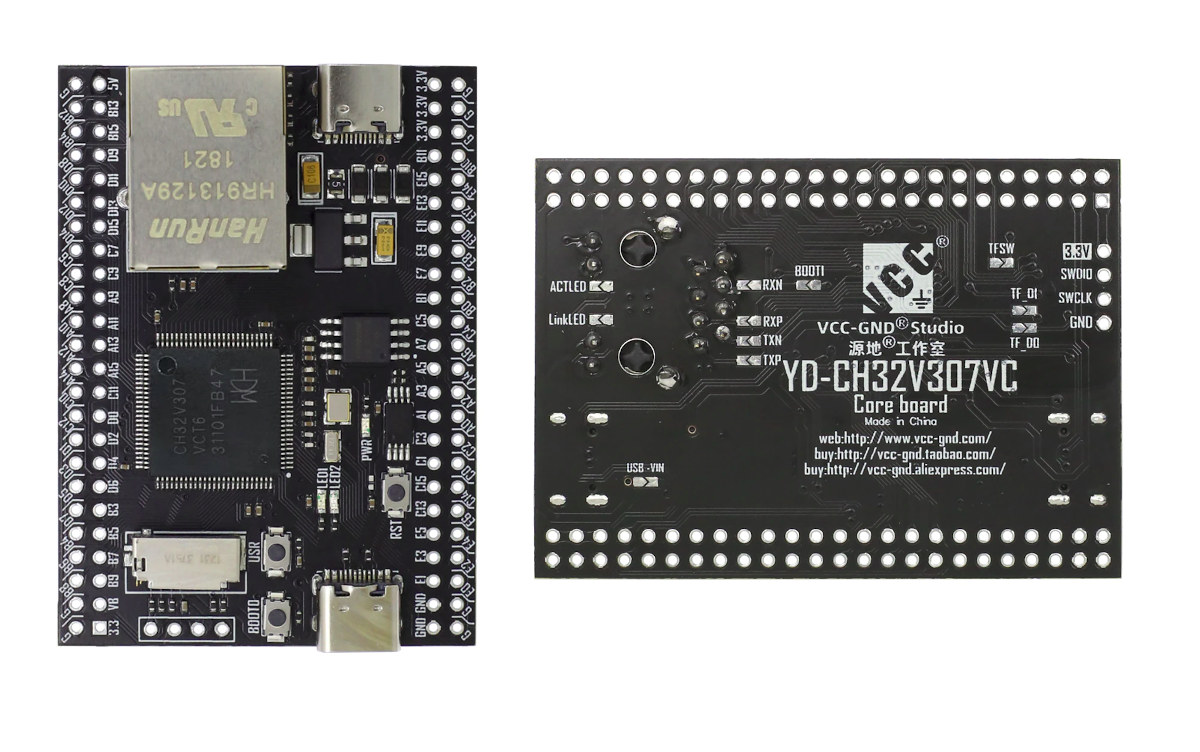
YD-CH32V307VCT6 BSP Introduction
1 Introduction
YD-CH32V307VCT6 is a RISC-V core-based development board with a maximum main frequency of 144Mhz. It delivers the best value for developers to try and get started with RISC-V architecture.
This document records the execution instruction of the BSP (board support package) provided by the RT-Thread community for the CH32V307V-R1 development board.
The document is covered in three parts:
- Board Resources Introduction
- Compiling
- Quickly Get Started
By reading the Quickly Get Started section developers can quickly get their hands on this BSP and run RT-Thread on the board.
Features
- MCU: CH32V307VCT6, main frequency 144MHz,FLASH and RAM are available for configuration.
- LED: 2, user LEDs (blue and red).
- Button: 3, Reset, Boot, User.
- SPI Flash: 32M-bit serial flash memory (W25Q32).
- I2C EEPROM: 64k-bit serial EEPROM (24C64).
- USB: 2, Type-C.
- Network Port: 1, 10M PHY inside.
- SDIO: microSD connector.
- Debug interface: SWD.
- 8 MHz external quartz oscillator (HSE).
- 32,768 Hz external RTC quartz oscillator (LSE).
For more details about this board, please refer to:
2 Compiling
The BSP supports the RISC-V GCC development environment, here's the specific version information:
| IDE/Compiler | Version Tested |
|---|---|
| GCC | WCH RISC-V GCC 8.2.0 |
3 Quickly Get Started
3.1 Using Linux to compile BSP
This section is about to introduce how to compile the BSP in Linux.
3.1.1 Compile BSP
- Download WCH Compile Toolchain
- Download the RT-Thread latest code
- Install SCons construction tool (similar GNU Make): sudo apt install scons
- Edit the variable EXEC_PATH in file rtconfig.py to point to the directory with executable WCH Compile Toolchain (file riscv-none-embed-gcc).
- Configure RT-Thread and hardware board: scons --menuconfig
- Start compilation: scons
- After compilation, the rtthread.bin file will be generated
3.1.2 Download
- Clone source file: git clone https://github.com/jmaselbas/wch-isp.git
- Compile and install :
- cd wch-isp
- make && sudo make install && sudo make load
- Use a USB cable Type-C to connect board to the PC. Hold button BOOT0, press briefly button RST and release button BOOT0.
- Check board connection:
wch-isp list
0: BTVER v2.9 UID 10-46-89-26-3b-38-d4-a4 [0x1770] CH32V307VCT6
MCU current flash size: 256 Kbyte
Note that Chip Mem here is set to 256K ROM + 64K RAM (see Table 2-1 of datasheet CH32V307, and chapter 32.6 "User Option Bytes" of Reference Manual CH32V2x_V3x).
- Download firmware to board:
wch-isp -p flash ./rtthread.bin && wch-isp reset
3.1.3 Running Result
- Connect USB-UART converter to board:
- board pin A9 (UART1_TX) -> converter RX
- board pin A10 (UART1_RX) -> converter TX (optional, for enter commands)
- In the terminal tool, open the converter serial port (default 115200-8-1-N), and after resetting the device, you can see the output information of RT-Thread on the serial port:
 \ | /
- RT -     Thread Operating System
 / | \     5.1.0 build Jan  6 2024 17:12:03
 2006 - 2022 Copyright by RT-Thread team
SystemClk: 144000000 Hz
msh >
On board LEDs (red and blue) blinking.
