6.8 KiB
STM32MP157A-EV1 BSP Introduction
中文页 |
Introduction
This document records the execution instruction of the BSP (board support package) provided by the RT-Thread development team for the STM32MP157A-EV1 development board.
The document is covered in three parts:
-
STM32MP157A-EV1 Board Resources Introduction
-
Quickly Get Started
-
Advanced Features
By reading the Quickly Get Started section developers can quickly get their hands on this BSP and run RT-Thread on the board. More advanced features will be introduced in the Advanced Features section to help developers take advantage of RT-Thread to drive more on-board resources.
STM32MP157A-EV1 Board Resources Introduction
The STM32MP157A-EV1 is a development board based on a dual Cortex-A7 and Cortex-M4 core. The Cortex-A7 core operates at 650 MHZ and the Cortex-M4 operates at 209MHZ. There is no Flash inside the STM32MP157A.
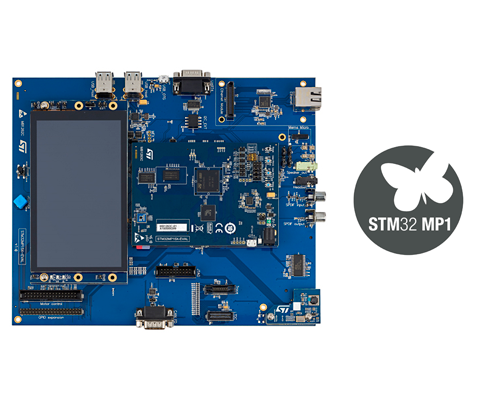
The mainly-used on-board resources are shown as follows:
- MCU : STM32MP157AAAx
- Common peripherals:
- 4 LEDs: LD4(PD8), LD5(PD9), LD2(PA13), LD3(PA14)
- 4 Buttons: WAKE_UP, RESET (NRST), USER1(PA13), USER2 (PA14)
- Common-used interface: USB, SD card, Ethernet, MIPI, USB HOST, Audio, HDMI, Arduino.
- Debug interface: Standard JTAG/SWD.
For more details about this board, please refer to the ST official documentation:
STM32MP157A-EV1 Development board introduction
Peripheral Condition
Each peripheral supporting condition for this BSP is as follows:
| On-board Peripheral | Support | Remark |
|---|---|---|
| USB TO UART | YES | |
| PMIC | NO | |
| CAMERA | NO | OV5640 |
| MFX | NO | |
| FMC | NO | MT25F8G08A8ACAH4 |
| QSPI FLASH | NO | MX25L51245G |
| OpenAMP | NO | |
| POWER | NO | |
| SD Card (SDMMC1) | NO | |
| EMMC(SDMMC2) | NO | |
| ETH | NO | |
| AUDIO | NO | WM8994 |
| On-chip Peripheral Drivers | Support | Remark |
| GPIO | YES | |
| UART | YES | UART4 (ST-Link) |
| EXTI | YES | |
| SPI | YES | |
| TIM | YES | |
| LPTIM | YES | |
| I2C | YES | Software |
| ADC | YES | |
| DAC | YES | |
| WWDG | YES | |
| MDMA | NO | |
| SPDIFRX | NO | |
| DFSDM | NO | |
| PWM | NO | |
| FDCAN | NO | |
| CRC | NO | |
| RNG | NO | |
| HASH | NO |
Execution Instruction
Quickly Get Started
This BSP provides MDK4,MDK5 and IAR projects for developers. Also support GCC development environment,Here's an example of the MDK5 development environment, to introduce how to run the system.
Hardware Connection
Use a USB cable to connect the development board to the PC and turn on the power switch.
Compile And Download
Double-click the project.uvprojx file, to open the MDK5 project, compile and download the program to the board.
By default, the project uses ST_LINK simulator to download the program, when the ST_LINK connects the board, clicking the download button can download the program to the board.
Running Results
After the program is successfully downloaded, the system runs automatically. Observe the running results of the LED on the development board, the orange LD4 will flash periodically.
Connect the serial port of the board to PC, communicate with it via a serial terminal tool (115200-8-1-N). Restart the board and the startup information of RT-Thread will be observed:
 \ | /
- RT -     Thread Operating System
 / | \     3.1.1 build Nov 19 2018
 2006 - 2018 Copyright by rt-thread team
msh >
Drivers
1. DAC
- Open the Env tool under this BSP;
- Enter the
menuconfigcommand, enter the Hardware Drivers config and open DAC, save and exit; - Enter the
scons --target=iarcommand to regenerate project.
Finsh
Before you use a device, you need to find out if the device exists, and you can use the name of the DAC device that is enrolled with the command dac probe . As shown as follows.
msh />dac probe dac1
probe dac1 success
Enable the channel of the device can use the command dac enable followed by the channel number.
msh />dac probe dac1
probe dac1 success
Set up the data of the channel for a DAC device can use the command dac write followed by the channel number.
msh />dac write 1 1000
dac1 channel 1 write value is 1000
Disable the channel of the device can use the command dac disable followed by the channel number.
msh />dac disable 1
dac1 channel 1 disable success
Advanced Features
This BSP only enables GPIO and serial port 4 by default. If need more advanced features, you need to configure the BSP with RT-Thread Env tools, as follows:
- Open the Env tool under this BSP;
- Enter the
menuconfigcommand to configure the project, then save and exit; - Enter the
pkgs --updatecommand to update the packages; - Enter the
scons --target=iarcommand to regenerate the project.
Notes
- Before downloading the program, set the board to the mode of "Engineering Mode". The BOOT switch sets to BOOT0=0,BOOT1 = 0 and BOOT2=1, as shown below:
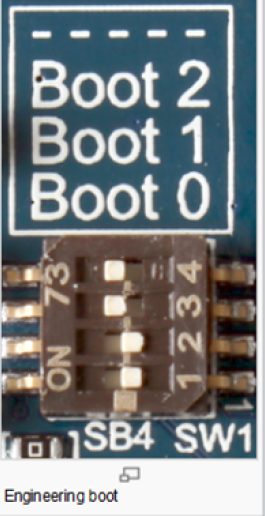
- If need to reburn the program, please reset the development board.
Contact Information
accendant: